I have been wanting to make a coffee table for some time and have been searching for ideas on how to design one. Like so many other people, I browse websites to get ideas, and I came across a pic of a herringbone design topped coffee table. Interestingly enough, a week or so before I saw a picture of the design I have settled on, I was at a local art museum which had a herringbone wood floor in one of the galleries. So when I found a pic of a table, I knew it was the one I would do.
Some basic rules I made for myself for this project:
1. The wood I would use would either be (predominantly) reclaimed or cut from wood/ downed trees on our property.
2. No metal fasteners would be visible. No nail holes (as result of my doing… It’s ok if they were already there).
3. Spend as little money on materials as possible / Use materials that I already have.
The base for the top:
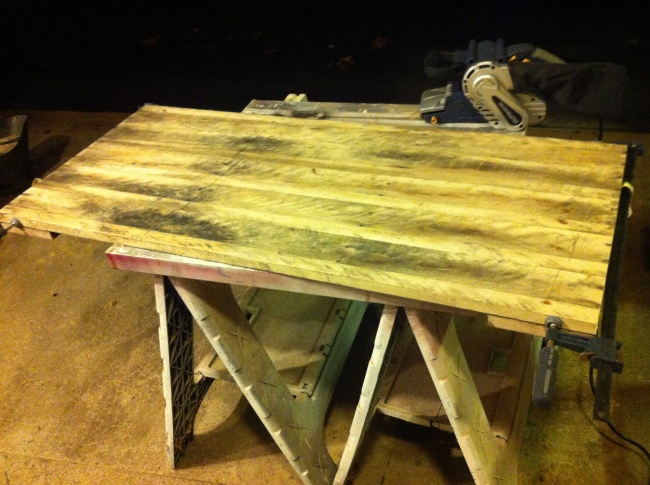
I used a pallet that had all uniform slats and they were all basically ~5″ × 48″ × 7/8″ thick. I tacked (18ga brads) and glued (titebond II) a cleat on the underside of the base to hold it all together.
MISTAKE #1: I should have used a biscuit joiner to fuse the boards together lengthwise.
MISTAKE (?) #2: Save up to buy a planer, so the herringbone boards won’t be doing the wave across the top.
The herringbone boards:
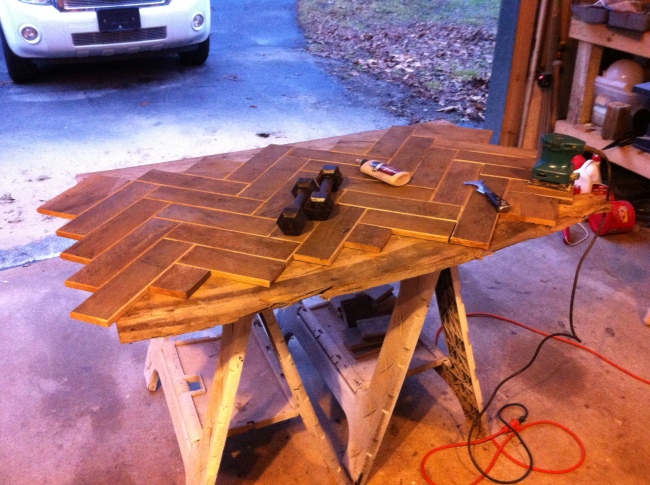
I cut two pallets down to harvest the slats. Using a circular saw, I cut just inside/ in between the nails to get 2/3 of the boards at a longer length (from the outsides of the pallet) and 1/3 of the boards for a shorter length (from the center of the pallet). Using a 10″ blade table saw and a cutoff saw, I cut all the top boards to approximately 12″ × 3.5″, and they were already 5/8″ thick. The herringbone layout took about 5 tries to get it right and tight. I figured that having the boards at 12″ long would simplify layout, which it seemed to. I used a carpenter’s metal square and pencil to measure. I had planned to cut off all the excess, so that is why there is so much overhang around all four edges. Pallet wood makes great kindling.
The table top wrapped:
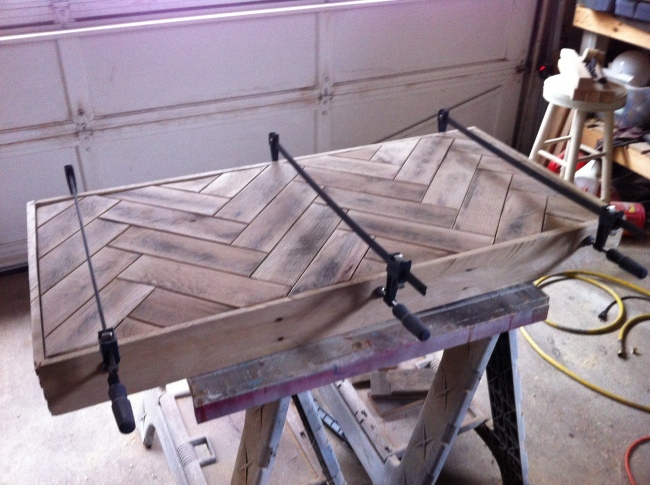
I used a dovetail jig and plunge router to dovetail the corners to (what I call) the skirt. It didn’t turn out as tight a fit as I had hoped, but I believe I will be able to sand it all out without it looking too bad. I used 3/8″ dowels and titebond glue to connect the skirt to the base. The skirt boards were previously also 7/8″ thick, but I cut them on the table saw down to 5/8″ thick to make them more flexible and to reduce the overall weight of the table.
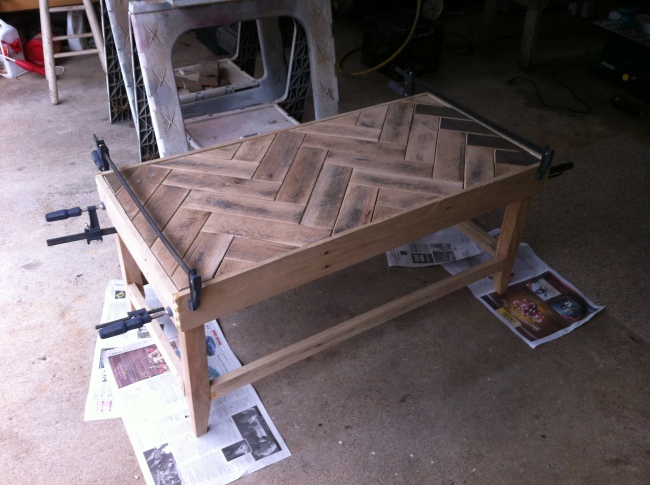
The almost finished table (not so fast…)
The legs were cut from surplus firewood harvested from a sycamore tree on our property. I dubbed the tree “The Ugly Tree” because it slanted about 80 degrees to the southwest, was rotten in the heartwood, had 3 feet of dirt in the top of the trunk, and had several limbs growing out of the top in various directions. I cut the legs to 1 7/8″ square × 18.5″ long. They ended up with the grain showing a look similar to leopard spots and tiger stripes, which I find visually appealing. Who knew The Ugly Tree would give me a lesson in not judging a book by it’s cover… I glued and dowelled the legs to the base of the top, as well as screwed angle irons to anchor them to the cleats under the base. Then I cut the rails, to add structure and stability to the table, and glued, dowelled, and clamped them. Waiting for glue to dry.
In the pic just above, notice the five darker pieces… well, I had sizeable gaps in between the herringbone pieces and the skirt, so I popped the old out and recut some new pieces to better fill out the gaps. Waiting on glue to dry.
Sometime in the near future, the table will be finished and in use. Still left to do:
1. Sand down the top and skirt with belt sander to better hide my flaws and shape the top to a more uniform. ‘flatness’. Doesn’t have to be perfect, but I am my own worst critic.
2. Fine sand all the deep scratches caused by #1.
3. Select a stain to match the wood on our couches. Hopefully I already have some in my paint shop. Kinda looks like pecan…
4. Finish with Minwax Semi-Gloss Polyurethane, since I already have a quart. Not sure how many coats yet. Maybe at least 2-3…
Stay tuned…


